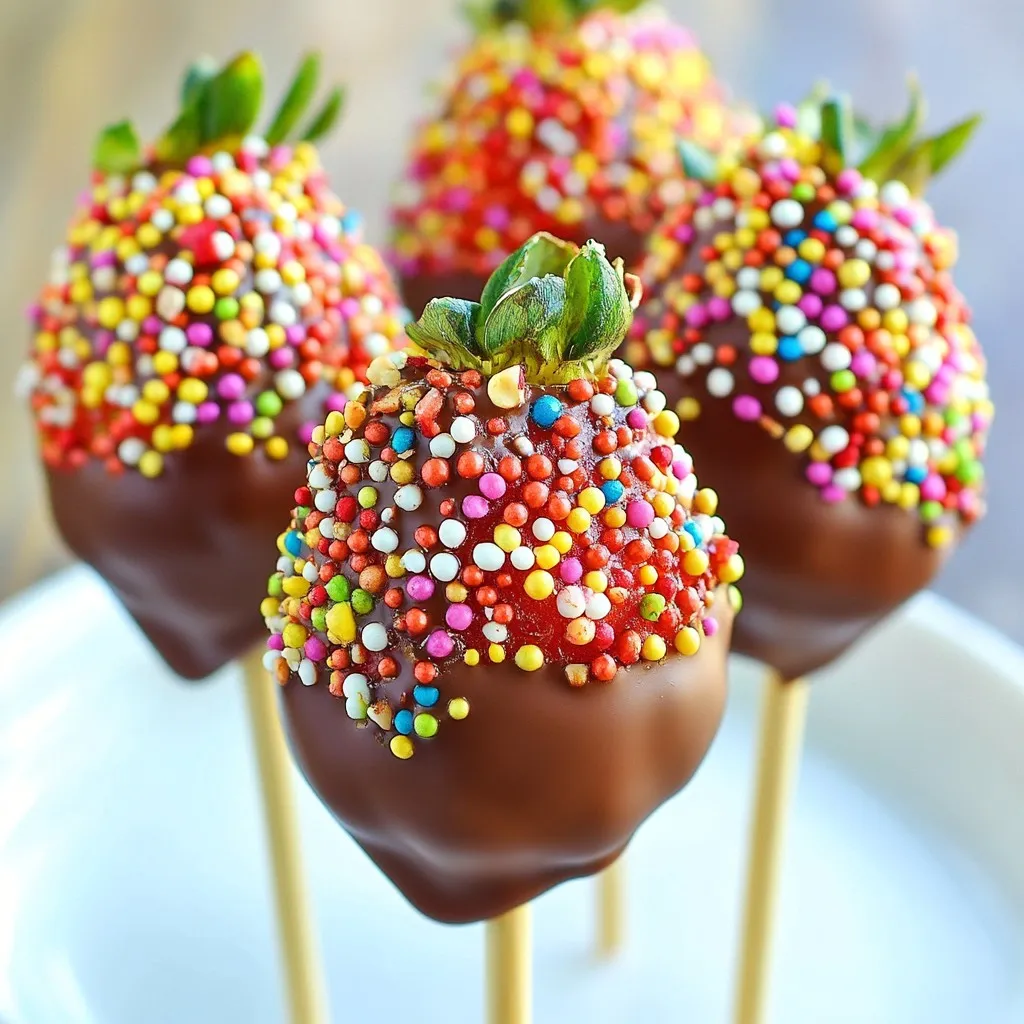
Chocolate covered strawberry pops are a fun treat that you can easily make at home! These delightful pops combine sweet strawberries with rich chocolate. You can add your favorite toppings for extra crunch and flair. Whether you’re planning a party or a special snack, these pops will impress everyone. Let me guide you through the steps to create these tasty delights that everyone will love!
Why I Love This Recipe
- Easy to Make: This recipe only requires a few simple ingredients and steps, making it perfect for cooks of any skill level.
- Customizable: You can easily switch up the toppings, using nuts, sprinkles, or even coconut for a unique twist each time.
- Visually Stunning: These chocolate-covered strawberry pops are not only delicious but also look beautiful, making them great for parties or gifts.
- Healthier Indulgence: With fresh strawberries at the base, you’re getting a nutritious fruit treat that satisfies your sweet tooth without the guilt!
Ingredients
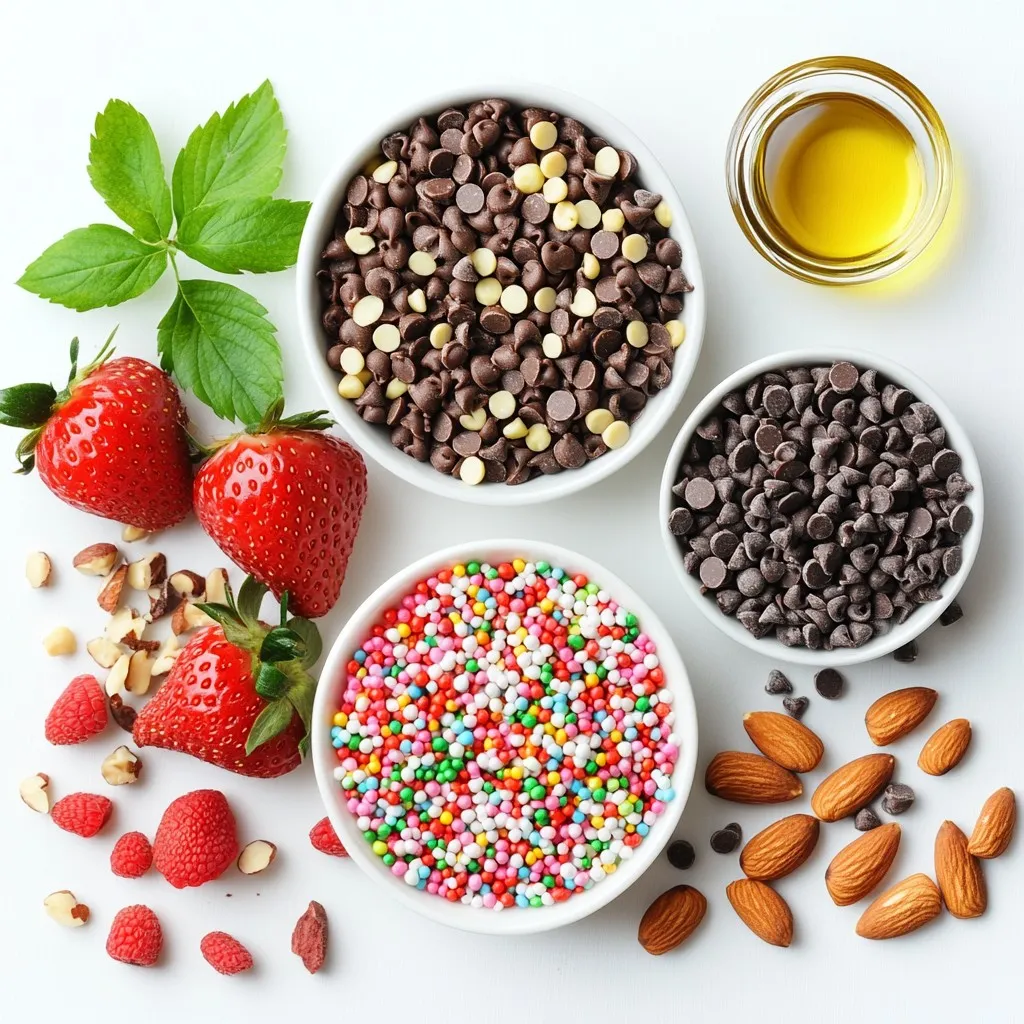
Fresh Strawberries
You need 1 pint of fresh strawberries for this recipe. Make sure to wash them well and dry them gently. Choose ripe strawberries with bright colors for the best taste. The fresh fruit will give a sweet and juicy burst in each bite.
Chocolate and Oil
For the chocolate coating, use 8 ounces of semi-sweet chocolate chips. This type of chocolate melts nicely and gives a rich flavor. Add 2 tablespoons of coconut oil or vegetable oil. The oil helps the chocolate melt smoothly and coat the strawberries evenly.
Toppings and Presentation
You can get creative with toppings! Use 1/2 cup of crushed nuts, such as almonds, pistachios, or hazelnuts. These nuts add a nice crunch. For a pop of color, you can also use 1/2 cup of colorful sprinkles. They make your pops fun and festive! Use lollipop sticks or wooden skewers to hold the strawberries while you dip them in chocolate. Arrange the finished pops in a decorative glass for a charming display.
Step-by-Step Instructions
Preparing the Strawberries
Start by washing the strawberries well. Dry them gently with a clean towel. Next, grab a lollipop stick or skewer. Carefully poke it into the stem end of each strawberry. Make sure it goes in far enough to hold the berry but not too deep to pierce through. This stick will help you dip the strawberries later.
Melting the Chocolate
Now, let’s melt the chocolate! In a microwave-safe bowl, mix the semi-sweet chocolate chips with coconut oil. The oil helps the chocolate melt smoothly. Heat the bowl in the microwave. Do this in 30-second intervals. Stir the chocolate between each round. Keep going until it is completely melted and glossy. This smooth chocolate will make a great coating.
Coating and Adding Toppings
Grab each strawberry by the stick. Dip it into the melted chocolate. Rotate it gently to cover the whole strawberry. Allow any extra chocolate to drip back into the bowl. While the chocolate is still wet, roll the strawberry in your choice of toppings. You can use crushed nuts or colorful sprinkles for a fun look. Make sure to cover all sides for a tasty crunch.
Setting and Chilling the Pops
Once coated, it’s time to set the pops. Place the chocolate-covered strawberries upright. You can use a foam block, a sturdy glass, or a baking sheet lined with parchment paper. Make sure they don’t touch each other. This will help them keep their shape. Now, pop them in the refrigerator for about 30 minutes. This will let the chocolate harden and be ready to eat.
Tips & Tricks
Achieving the Perfect Chocolate Consistency
To get smooth chocolate, use semi-sweet chocolate chips. Mix in 2 tablespoons of coconut oil. This oil helps the chocolate melt evenly. Heat it in the microwave. Use 30-second bursts to avoid burning. Stir well after each burst. The chocolate should be glossy and thick, perfect for coating.
Ideas for Creative Toppings
Get creative with toppings! Try crushed nuts like almonds or pistachios. They add crunch and flavor. Colorful sprinkles make the pops look fun and festive. You can also use shredded coconut or mini chocolate chips. Roll the chocolate-dipped strawberries in toppings while the chocolate is still wet. This helps the toppings stick better.
Serving Suggestions
For a great presentation, stand the pops up in a foam block or a glass. This keeps them from touching and ruining the chocolate. You can also use a baking sheet lined with parchment paper. Add extra sprinkles around the base for flair. These pops are perfect for parties or gifts. Enjoy them chilled for the best taste!
Pro Tips
- Choose the Right Chocolate: Using high-quality chocolate will enhance the flavor of your pops. Consider using dark or milk chocolate for a richer taste.
- Keep Strawberries Dry: Ensure that your strawberries are completely dry before dipping. Any moisture can cause the chocolate to seize and not adhere properly.
- Experiment with Toppings: Get creative with your toppings! Try using crushed cookies, shredded coconut, or even edible glitter for a unique touch.
- Storage Tips: Store your chocolate-covered strawberry pops in an airtight container in the refrigerator to keep them fresh. Enjoy within a few days for the best taste!
Variations
Different Chocolate Types
You can use many types of chocolate for your pops. Semi-sweet chocolate is a classic choice. Dark chocolate gives a rich taste. Milk chocolate adds sweetness. White chocolate is fun and creamy. You can mix chocolates for a unique flavor. Each type brings its own twist to the treat.
Fruit Alternatives
While strawberries are great, you can try other fruits. Fresh bananas are a fun option. Pineapple chunks offer a tropical touch. Apples, with their crispness, work well too. Even grapes can be dipped for a bite-sized treat. Just pick fruits that are firm and easy to dip.
Seasonal Decorating Ideas
You can change the look of your pops for any season. For spring, use pastel sprinkles and flowers. In summer, bright colors add cheer. For fall, add orange and brown toppings. Winter calls for snowflake sprinkles or chocolate drizzle. These small touches make your pops festive and fun.
Storage Info
Best Practices for Storing Pops
To keep your chocolate covered strawberry pops fresh, store them in a cool place. Use an airtight container to prevent moisture from ruining the chocolate. Avoid stacking the pops directly on top of each other. Instead, place parchment paper between them to avoid sticking. If you want to keep them fresh longer, the refrigerator is a good choice.
How Long They Last
These delightful treats stay fresh for about 2 to 3 days in the fridge. After that, the strawberries may lose their crispness, and the chocolate may start to look dull. If you notice any signs of spoilage, it’s best to toss them out. Trust me, you want to enjoy them while they are at their best!
Freezing Chocolate Covered Strawberries
Freezing is a great option if you want to save your pops for later. To freeze, arrange the pops on a baking sheet lined with parchment paper. Place them in the freezer until solid, around 1 to 2 hours. Once frozen, transfer them to an airtight container or freezer bag. They can last up to 2 months in the freezer. When you’re ready to eat them, let them sit in the fridge for a few hours before serving. This will help them regain their texture. Enjoy your delicious treats!
FAQs
What is the best type of chocolate for coating?
I love using semi-sweet chocolate for coating. It strikes the right balance between sweet and rich. Milk chocolate can be too sweet, while dark chocolate can be bitter. If you want a different taste, try white chocolate. Just remember to add coconut oil for smoothness. This will help your chocolate melt well and coat evenly.
Can I use frozen strawberries?
I recommend fresh strawberries for the best taste. Frozen strawberries can release extra water when thawed. This can make the chocolate slide off. If you only have frozen strawberries, let them thaw completely and dry them well. This way, you can still enjoy a tasty treat, but fresh berries work best!
How do I keep my chocolate from cracking?
To avoid cracking, melt your chocolate slowly. Use a microwave-safe bowl and heat in short bursts. Stir well between each burst. Adding coconut oil helps too. It makes the chocolate smoother and more flexible. Once coated, let the pops cool at room temperature before chilling. This helps the chocolate set without cracking.
Are there any dairy-free alternatives?
Yes! You can use dairy-free chocolate chips. Look for brands that are labeled dairy-free or vegan. You can still follow the same melting process. Just ensure your coconut oil is also dairy-free. This way, everyone can enjoy these tasty chocolate-covered strawberry pops!
In this post, we covered how to make delicious chocolate-covered strawberries. We explored fresh ingredients, step-by-step instructions, and helpful tips. You now know how to melt chocolate, coat strawberries, and add fun toppings. We also looked at variations and storage tips to keep your treats fresh.
Making these pops is simple and fun. Enjoy experimenting with different flavors and decorations. Share them with friends and family, as they are sure to impress! Happy poppin