Looking for a tasty treat that’s both simple and delicious? You’ll love these Cranberry Orange Scones! With just a few ingredients, you can whip up scones bursting with flavor. I’ll guide you through easy steps, ingredient tips, and variations to make them your own. Perfect for breakfast or a snack, these scones will brighten your day. Let’s get baking!
Why I Love This Recipe
- Delicious Flavor Combination: The blend of sweet cranberries and zesty orange creates a perfect balance that is both refreshing and comforting.
- Easy to Make: This scone recipe is straightforward, allowing even novice bakers to whip up a delightful treat in no time.
- Perfect for Any Occasion: Whether it’s a festive gathering or a cozy afternoon tea, these scones make an excellent addition to any menu.
- Beautiful Presentation: With a light dusting of powdered sugar and vibrant garnishes, these scones are as visually appealing as they are tasty.
Ingredients
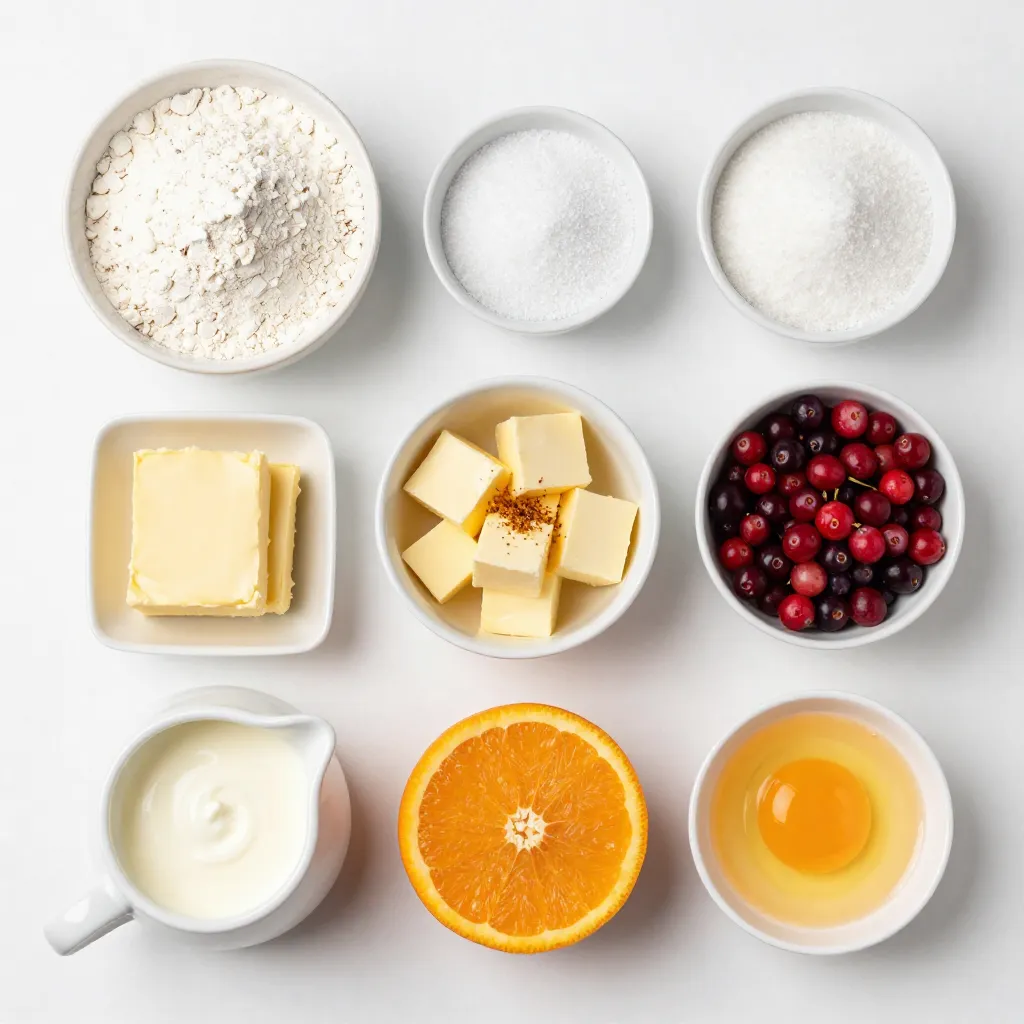
List of Ingredients for Cranberry Orange Scones
To make these delightful scones, gather the following ingredients:
– 2 cups all-purpose flour
– 1/2 cup granulated sugar
– 1 tablespoon baking powder
– 1/2 teaspoon salt
– 1/2 cup unsalted butter, cold and cubed
– 1 cup fresh or dried cranberries
– Zest of 1 large orange
– 1/2 cup heavy cream
– 1 egg, beaten (for egg wash)
These items work together to create a perfect balance of sweet and tart.
Optional Ingredient Substitutions
You can modify some ingredients in this recipe. Here are a few ideas:
– Use whole wheat flour for a nuttier flavor.
– Substitute brown sugar for a deeper sweetness.
– Instead of heavy cream, try buttermilk for a lighter scone.
– Use lemon zest if you want a different citrus flavor.
These adjustments can add new layers to your scones.
Nutritional Information Overview
Each scone offers a delightful blend of flavors. Here’s a simple breakdown:
– Calories: Approximately 200 per scone
– Protein: 3 grams
– Carbohydrates: 28 grams
– Fat: 10 grams
– Fiber: 1 gram
These scones are a tasty treat, perfect for breakfast or a snack. Enjoy your baking!
Step-by-Step Instructions
Prepping the Oven and Baking Sheet
First, set your oven to 400°F (200°C). This heat makes the scones rise nicely. Next, grab a baking sheet. Line it with parchment paper. This helps the scones not stick.
Mixing Dry Ingredients
In a large bowl, combine 2 cups of all-purpose flour, 1/2 cup of granulated sugar, 1 tablespoon of baking powder, and 1/2 teaspoon of salt. Use a whisk to mix them well. Make sure there are no lumps left. This mix is the base for our scones.
Incorporating Butter and Adding Fruit
Now, add 1/2 cup of cold, cubed butter to the flour mix. You can use a pastry cutter or your fingers. Mix until the butter looks like small pebbles. Next, fold in 1 cup of cranberries and the zest of 1 large orange. This adds a burst of flavor.
Forming and Shaping the Dough
Pour in 1/2 cup of heavy cream slowly. Use a spatula to stir until the dough forms. Don’t worry if it looks a bit dry. Turn the dough onto a floured surface. Gently knead it just a few times until it’s smooth. Shape it into a circle about 1-inch thick. Cut it into wedges or use a round cutter for fun shapes.
Baking the Scones to Perfection
Place the scones on your prepared baking sheet. Leave some space between each one. Brush the tops with a beaten egg for a golden finish. Bake them for 15-20 minutes. They’re done when they are golden-brown and a toothpick comes out clean. After baking, cool them slightly on a wire rack. Enjoy your delicious Cranberry Orange Scones!
Tips & Tricks
How to Achieve the Perfect Texture
To make your cranberry orange scones light and flaky, start with cold butter. Cold butter creates pockets of air, making your scones rise. Use a pastry cutter or your fingers to mix. Aim for pea-sized pieces. This helps keep the texture just right.
Best Practices for Mixing Dough
Mixing the dough gently is key. After adding the cream, use a spatula to combine. Stir just until the dough forms. Overmixing can make scones tough. It’s okay if some dry bits remain. A few gentle kneads on a floured surface will bring it together.
Serving Suggestions for Cranberry Orange Scones
Serve your scones warm for the best taste. Place them on a lovely platter. Dust with powdered sugar for a sweet touch. Add fresh cranberries and orange slices for color. A side of clotted cream or butter makes for a delightful pairing. Enjoy with tea or coffee!
Pro Tips
- Use Cold Butter: Ensure your butter is cold and cubed before mixing it into the dry ingredients. This helps create a flaky texture in the scones.
- Don’t Overmix: When combining the dough, mix just until it comes together. Overmixing can lead to tough scones.
- Experiment with Flavors: Feel free to add other ingredients like chocolate chips or nuts to customize your scones to your taste.
- Serve Warm: For the best flavor and texture, serve the scones warm from the oven, ideally with a spread of butter or cream cheese.
Variations
Using Dried vs. Fresh Cranberries
You can use either dried or fresh cranberries in your scones. Fresh cranberries give a bright, tart flavor. They also add moisture, which makes the scones fluffy. Dried cranberries are sweeter and chewier. They can make the scones a bit denser. You can even mix both for a fun texture and flavor combo.
Different Citrus Zests for Flavor Enhancement
While orange zest shines in this recipe, you can try other citrus fruits. Lemon zest adds a fresh, zesty taste. Lime zest gives a more tropical touch. Grapefruit zest can create a unique twist. Each zest brings a new flavor dimension, so feel free to experiment!
Adding Nuts or Chocolate Chips
Nuts and chocolate can elevate your scones. Walnuts or pecans add a crunchy texture and nutty flavor. They pair well with the tart cranberries. Dark chocolate chips add sweetness and richness. You can mix and match these additions to suit your taste. Just make sure they don’t overpower the cranberry and orange flavors!
Storage Info
How to Store Leftover Scones
To keep your scones fresh, store them in an airtight container. You can also wrap them tightly in plastic wrap. Keep them at room temperature for up to two days. Avoid the fridge, as it can make them dry. If you want to keep them longer, try freezing instead.
Reheating Scones for Best Flavor
When you want to enjoy your scones again, reheating is key. Preheat your oven to 350°F (175°C). Place the scones on a baking sheet. Heat them for about 5 to 10 minutes. This method makes them warm and soft again. You can also use a microwave. Heat for about 15 to 20 seconds. But be careful not to overdo it, as they can become chewy.
Freezing Scones for Future Enjoyment
Freezing scones is a great way to save them for later. After they cool completely, wrap each scone in plastic wrap. Place them in a freezer-safe bag or box. This way, they last up to three months. When you’re ready to eat, thaw them overnight in the fridge. Then, reheat them in the oven for the best taste. Enjoy your fresh scones anytime!
FAQs
Can I make Cranberry Orange Scones ahead of time?
Yes, you can make Cranberry Orange Scones ahead of time. You can prepare the dough and shape it. Then, wrap the scones tightly in plastic wrap. Store them in the fridge for up to 24 hours. When you are ready to bake, just preheat your oven and bake as directed. This way, you can enjoy fresh scones quickly.
What can I use instead of heavy cream?
If you need a substitute for heavy cream, you can use milk or half-and-half. For a thicker texture, mix equal parts of milk and plain yogurt. This will give a similar richness to your scones. You can also use almond milk or coconut cream for dairy-free options. Just remember that this might change the flavor a bit.
How do I know when scones are done baking?
To check if your scones are done, look for a golden-brown color on top. Insert a toothpick into the center of a scone. If it comes out clean, the scones are ready. The edges should feel firm but not hard. If they are still soft, give them a few more minutes in the oven. Enjoy the aroma while they bake!
Cranberry orange scones are simple to make and great for any meal. You learned about the main ingredients, easy steps to bake, and useful tips for the best results. You also discovered tasty variations to try and how to store leftovers. Enjoy these scones fresh or save some for later. Each bite can bring a burst of flavor to your day. Now, get in the kitchen and bake some delicious scone