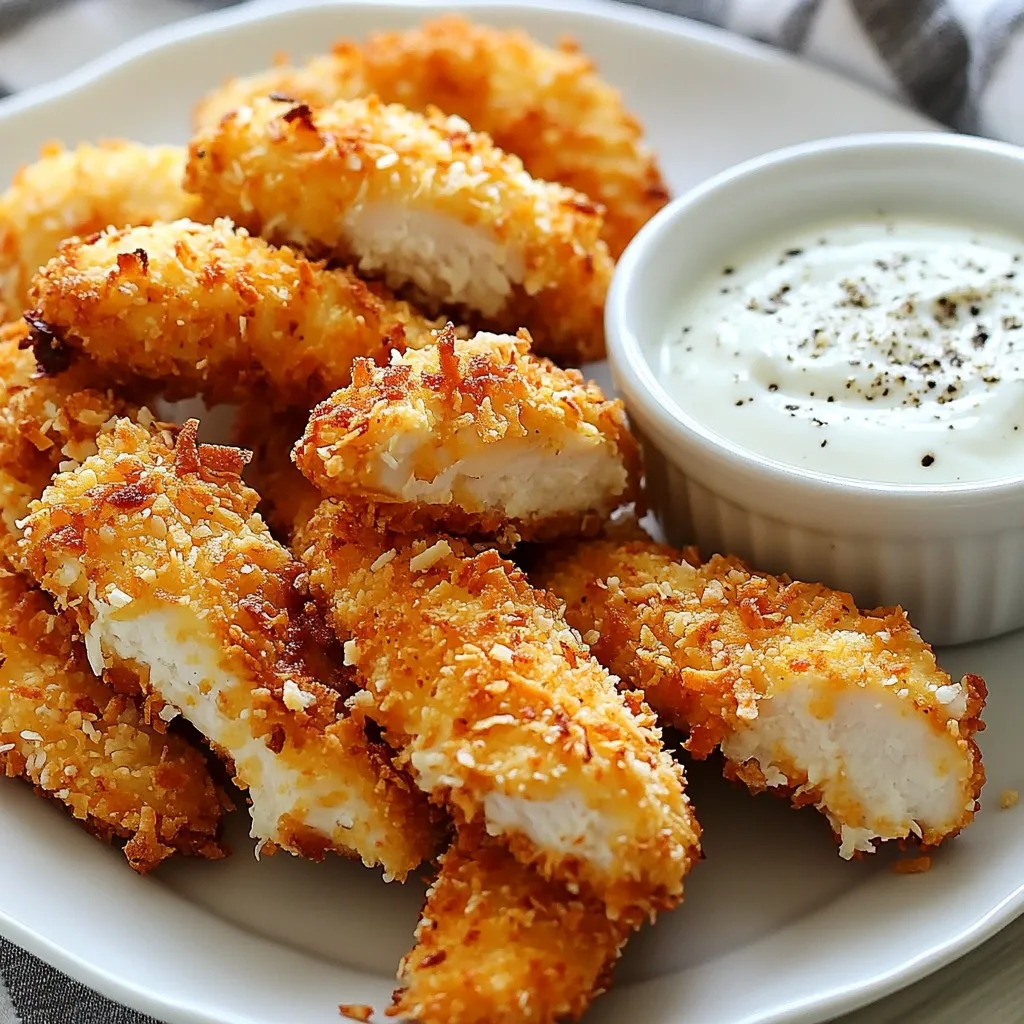
If you crave something crunchy and flavorful, you must try these Crispy Coconut Chicken Strips! They’re easy to make and perfect for any meal. With just a few simple ingredients, you’ll impress your family and friends. Ready to dive into a dish that’s both fun to eat and simple to prepare? Let’s get started on this delightful recipe that’s sure to become a new favorite!
Why I Love This Recipe
- Crispy Texture: The combination of panko breadcrumbs and shredded coconut creates an irresistible crunch that elevates the chicken strips to a whole new level.
- Versatile Dipping Sauces: These chicken strips pair wonderfully with a variety of sauces, from sweet chili to tangy yogurt, making them perfect for any occasion.
- Quick and Easy: With a prep time of just 15 minutes, this recipe is perfect for a weeknight dinner or a last-minute appetizer.
- Kid-Friendly: The crispy coconut coating is sure to please even the pickiest eaters, making this dish a hit with the whole family.
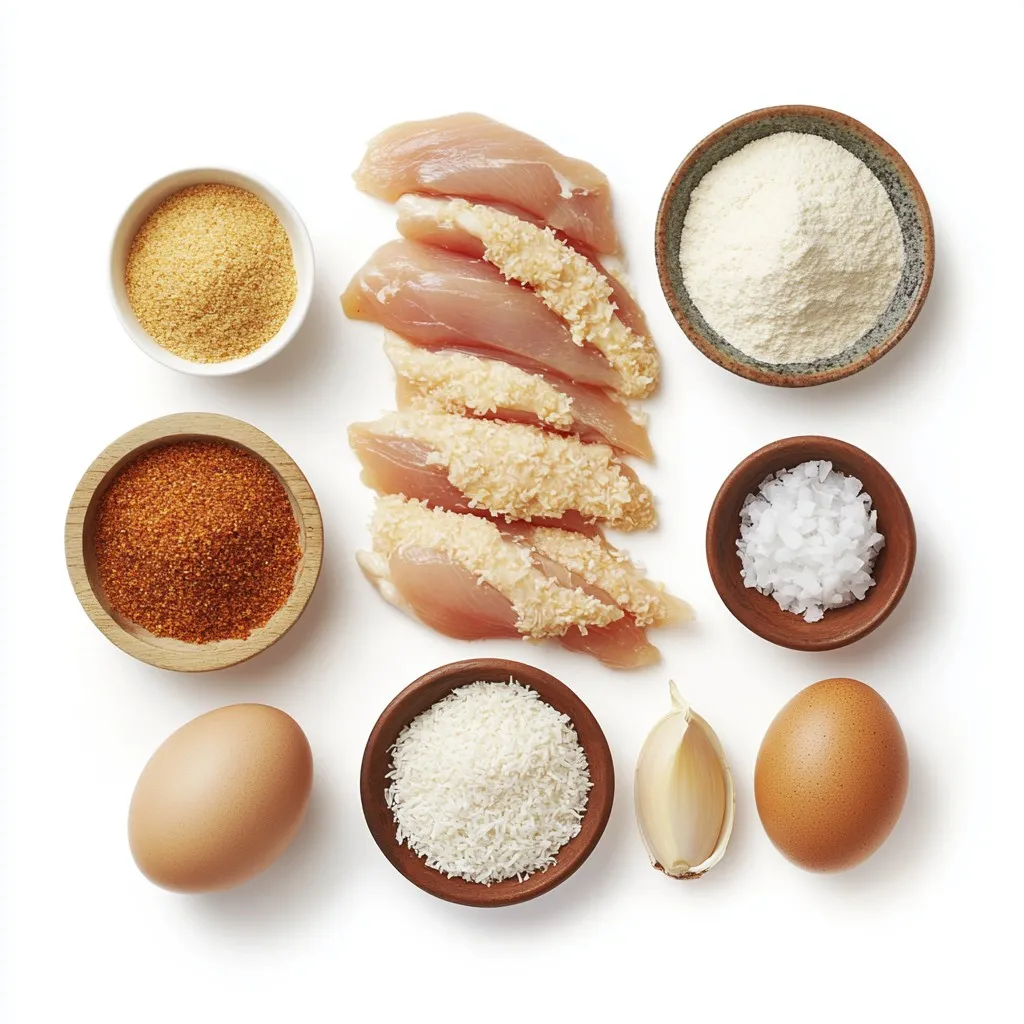
Ingredients
Chicken and Coating Essentials
– 1 pound chicken breasts, cut into even strips
– 1/2 cup all-purpose flour
Flavor Boosters
– 1 teaspoon garlic powder
– 1 teaspoon onion powder
– 1/2 teaspoon smoked paprika
– Salt and freshly ground black pepper to taste
Crunchy Coating Components
– 1 cup shredded coconut (sweetened or unsweetened)
– 1 cup panko breadcrumbs
– 2 large eggs, beaten
– Oil for frying (coconut oil or vegetable oil)
When I make crispy coconut chicken strips, I focus on quality ingredients. The chicken breast gives a great base. It is lean and cooks well. The all-purpose flour helps the coating stick. This is key for a crispy finish.
For flavor, I add garlic powder, onion powder, smoked paprika, salt, and pepper to the flour. Each spice adds depth. Garlic gives warmth, onion adds sweetness, and smoked paprika offers a hint of smokiness.
The coating is where the magic happens. I love using shredded coconut. You can choose sweetened or unsweetened based on your taste. Panko breadcrumbs create extra crunch. They are light and airy, which is perfect for frying.
Beating the eggs brings everything together. They help the flour and coating stick to the chicken. Finally, the oil is essential for frying. Coconut oil adds flavor, but vegetable oil works too. It’s all about balancing taste and texture in every bite.
Step-by-Step Instructions
Preparing the Dredging Station
To start, you need to set up your dredging station. Grab three shallow bowls. In the first bowl, mix 1/2 cup of all-purpose flour with salt, black pepper, 1 teaspoon of garlic powder, and 1 teaspoon of onion powder. This will give your chicken a nice flavor. In the second bowl, beat 2 large eggs until smooth. This helps the coating stick. In the third bowl, combine 1 cup of shredded coconut and 1 cup of panko breadcrumbs. Mix them well for that crunchy coating.
Coating the Chicken Strips
Now, take each chicken strip—1 pound of chicken breasts cut into even strips—and coat it in the flour mixture. Shake off any extra flour. Next, dip the chicken strip into the egg mixture. Make sure all sides are covered. Finally, roll the chicken in the coconut-panko mix. Press down gently to help it stick. Repeat this for all your chicken strips until they are fully coated and ready for cooking.
Cooking the Chicken Strips
For cooking, heat oil in a large skillet over medium heat. You want about 1/4 inch of oil in the pan. To check if the oil is hot enough, drop a little of the coconut-panko mix in it. If it sizzles, you’re good to go! Carefully place a few chicken strips in the hot oil. Don’t overcrowd the pan. Fry each strip for about 3-4 minutes on each side. They should be golden brown and fully cooked through. The internal temperature should reach 165°F (74°C). Once done, remove the strips and place them on a plate lined with paper towels. This helps absorb any extra oil.
Tips & Tricks
Perfecting the Coating
To ensure even coverage, follow these steps. First, prepare your dredging station with three bowls. One bowl holds the flour mixed with salt, pepper, garlic, and onion powder. The second bowl has beaten eggs. The last bowl contains the coconut and panko mix.
When coating the chicken, start by dredging each strip in the seasoned flour. Shake off any extra flour. This step helps the egg mixture stick better. Next, dip the strip in the beaten eggs, making sure it is fully covered. Finally, roll it in the coconut-panko mix. Press gently to help it stick. Repeat for all strips. An even coat gives you that perfect crunch.
Cooking Variations
If you prefer a lighter option, try baking or air-frying the chicken strips. For baking, preheat your oven to 400°F (200°C). Place the coated strips on a lined baking sheet. Spray them lightly with cooking oil to help them crisp up. Bake for about 20-25 minutes, flipping halfway through.
For air-frying, set your air fryer to 375°F (190°C). Cook the chicken strips in a single layer for about 10-12 minutes. Shake the basket halfway through for even cooking. Both methods provide a tasty, healthier alternative to frying.
Sauce Pairings
Dipping sauces can truly elevate your crispy coconut chicken strips. Here are a few tasty suggestions:
– Sweet Chili Sauce: This sauce adds a nice sweet and spicy kick.
– Yogurt Dip: A cool yogurt dip with herbs balances the flavors well.
– Honey Mustard: This classic sauce combines sweetness and tang.
– Sriracha Aioli: For a spicy touch, mix sriracha with mayonnaise.
Feel free to experiment with different sauces to find your favorite!
Pro Tips
- Choose the Right Coconut: For a sweeter flavor, use sweetened shredded coconut. Unsweetened coconut provides a more savory taste, allowing the chicken flavor to shine through.
- Maintain Oil Temperature: Keep an eye on the oil temperature while frying. If it’s too hot, the coating may burn before the chicken cooks through. Use a thermometer for best results.
- Double-Dip for Extra Crunch: For an even crunchier texture, consider double-dipping the chicken strips in the egg and coconut-panko mixture.
- Let It Rest: After frying, allow the chicken strips to rest for a few minutes on paper towels. This helps maintain their crispiness by preventing steam buildup.
Variations
Dietary Adjustments
If you want to make this dish gluten-free, you can swap the all-purpose flour. Use a gluten-free flour blend instead. It works well for coating. For the breadcrumbs, look for gluten-free panko or crushed rice cereal. Both options provide that crunchy texture you love.
Flavor Enhancements
To jazz up your coconut chicken strips, try adding some extra spices. A pinch of cayenne pepper gives it a nice kick. You can also sprinkle in some dried herbs like thyme or oregano for added depth. Mix in curry powder for a unique twist. These enhancements make each bite more exciting.
Ingredient Swaps
If chicken is not your thing, there are great swaps. Try shrimp or fish fillets for a lighter option. For a plant-based choice, use tofu or tempeh. Coat and cook them the same way as chicken. They will absorb the flavors and still be crunchy and delicious.
Storage Info
Storing Leftovers
To keep your crispy coconut chicken strips fresh, place them in an airtight container. You can store them in the fridge for up to three days. Ensure they cool down before sealing. This helps the strips stay crunchy.
Reheating Instructions
To reheat your chicken strips, use an oven or air fryer. Preheat your oven to 375°F (190°C). Place the strips on a baking sheet and heat for 10-15 minutes. This method helps keep them crispy. If using an air fryer, set it to 350°F (175°C) and heat for about 5-7 minutes.
Freezing Tips
If you want to freeze your chicken strips, do so before cooking. Lay them on a baking sheet in a single layer. Freeze for a few hours until solid. Then transfer them to a freezer bag. This way, they will not stick together. Use within three months for the best taste.
FAQs
How do I make Crispy Coconut Chicken Strips without frying?
You can bake or air-fry the chicken strips. To bake, preheat your oven to 400°F (200°C). Place the coated strips on a lined baking sheet. Spray them lightly with oil for a crispy finish. Bake for 15-20 minutes, flipping halfway through. For air-frying, set the air fryer to 375°F (190°C). Cook the strips in a single layer for about 10-12 minutes. Both methods give you a tasty and healthier version.
Can I prepare this recipe ahead of time?
Yes, you can prepare the chicken strips ahead of time. Coat them and place them in the fridge for up to 24 hours before cooking. This allows the flavors to meld and makes cooking easier. Just remember to let them sit at room temperature for about 15 minutes before cooking to ensure even cooking.
What dips pair well with Crispy Coconut Chicken Strips?
Many dips work well with these strips. Sweet chili sauce adds a nice kick. You can also try a tangy yogurt dip for a cool contrast. Other great options include honey mustard, barbecue sauce, or even a spicy mango salsa. Feel free to get creative and mix flavors to find your favorite!
This blog post covered all you need for crispy coconut chicken strips. We explored essential ingredients, step-by-step cooking tips, and fun variations for everyone. You can enjoy classic frying or choose healthier options like baking or air-frying. Don’t forget about tasty dips to boost your meal. I hope this recipe excites you in the kitchen and brings joy to your table. Happy cookin