Are you ready to bake the fluffiest milk bread ever? This Easy Milk Bread recipe will guide you through each step, making it simple to enjoy warm, homemade bread. You’ll learn about the best ingredients, handy tools, and easy techniques to avoid common mistakes. Say goodbye to store-bought bread and hello to the delightful taste of freshly baked milk bread. Let’s dive into this easy recipe that anyone can master!
Why I Love This Recipe
- Simple Ingredients: This recipe uses basic pantry staples, making it easy to whip up without a trip to the store.
- Quick Preparation: You can have this fluffy milk bread ready in just a couple of hours, perfect for last-minute baking.
- Versatile Use: This bread is perfect for sandwiches, toast, or simply enjoyed warm with butter and jam.
- Delightfully Soft Texture: The resulting bread is incredibly soft and fluffy, bringing a smile to everyone who tries it!
Ingredients
List of Ingredients
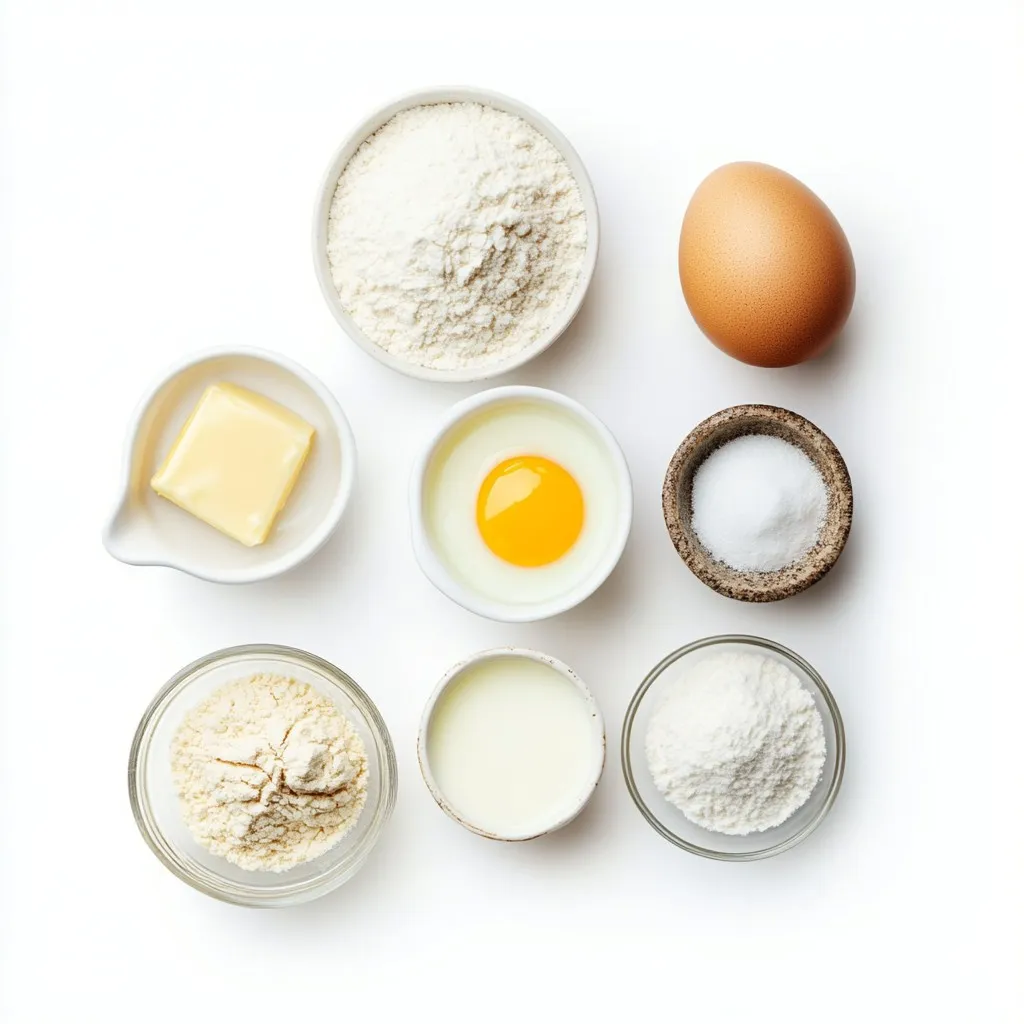
To make easy milk bread, gather these ingredients:
– 3 cups all-purpose flour
– 1 cup warm milk (about 110°F/45°C)
– 1/4 cup granulated sugar
– 1/4 cup unsalted butter, melted
– 1 tablespoon instant yeast
– 1 teaspoon salt
– 1 large egg
– Extra milk for brushing
Measuring Tips
Measuring ingredients correctly is key for great bread. Here are some tips:
– Use dry measuring cups for flour and sugar.
– Spoon flour into the cup, then level it off with a knife.
– For liquids, use a clear measuring cup with a spout.
– Check the temperature of the milk. It should feel warm, not hot.
Suggested Tools Needed
Having the right tools makes the process easier. You will need:
– Mixing bowls (one large and one small)
– A whisk for mixing dry ingredients
– A spatula or wooden spoon for dough
– A clean surface for kneading
– A loaf pan (9×5 inches)
– A kitchen towel to cover the dough
– An oven to bake the bread
– A wire rack to cool the bread after baking
Step-by-Step Instructions
Preparing the Yeast Mixture
Start by warming the milk. It should be about 110°F (45°C). Pour the warm milk into a bowl. Add the granulated sugar and stir until it dissolves. Sprinkle the instant yeast on top. Let this sit for about five minutes. You want it to get frothy and bubbly. This shows the yeast is active.
Mixing the Dough
In a large bowl, mix the all-purpose flour and salt. Use a whisk for even mixing. Make a well in the center of your dry mix. Pour in the bubbly yeast mixture, melted butter, and beaten egg. Stir these together with a spatula or spoon. Keep mixing until a shaggy dough forms.
Kneading Techniques
Remove the dough from the bowl and place it on a floured surface. Knead it for about ten minutes. Push and fold the dough, adding more flour if it sticks. You want the dough to be smooth and elastic. This step is key for fluffy bread.
First Rise
Grease a bowl with oil or cooking spray. Place your kneaded dough inside. Cover it with a kitchen towel. Let it rise in a warm spot for about one hour. The dough should double in size. This rise helps create the soft texture.
Shaping the Loaf
After the first rise, gently punch the dough down. This releases trapped air. Flatten it into a rectangle. Roll it tightly from one end to form a loaf shape. Place the seam-side down in a greased loaf pan.
Second Rise and Baking
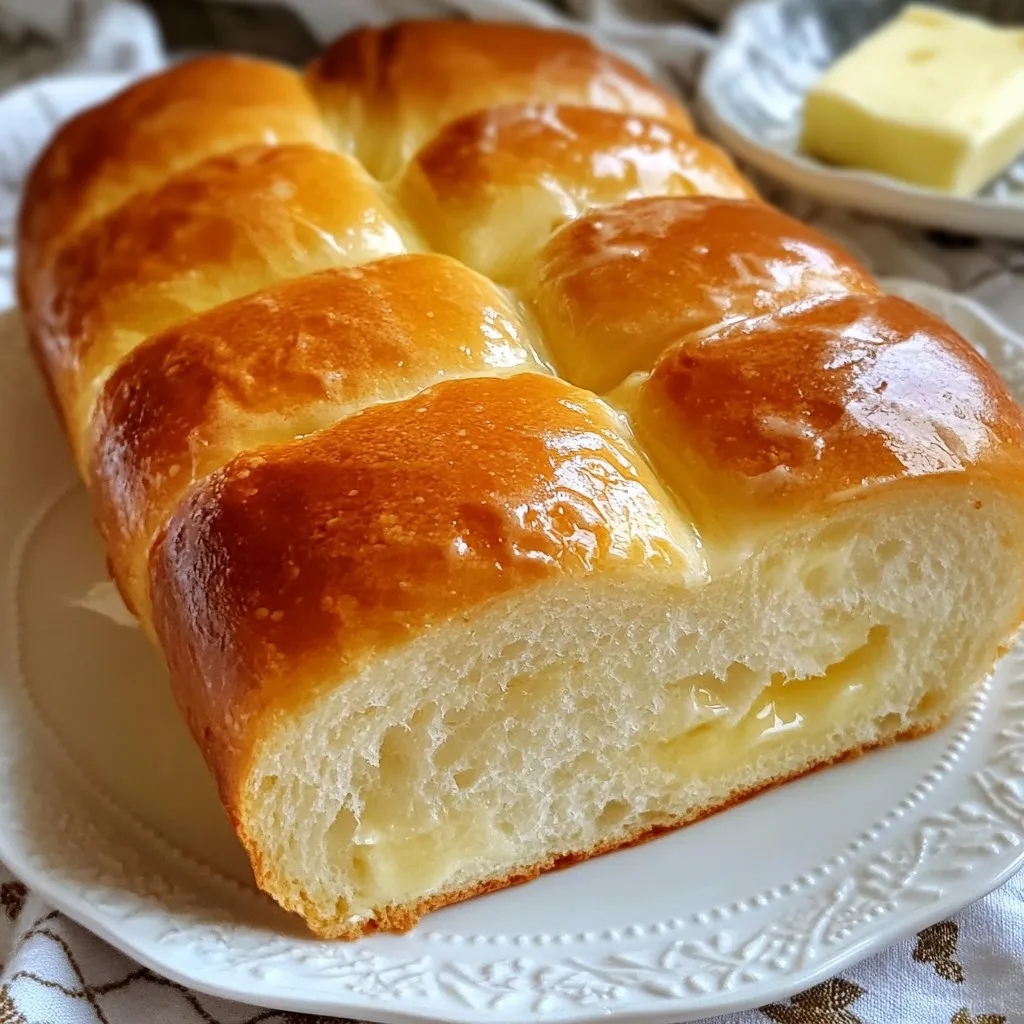
Cover the loaf again and let it rise for 30-45 minutes. It should puff up again. Preheat your oven to 350°F (175°C). Before baking, brush the top with extra milk. This gives a nice golden crust. Bake for 25-30 minutes. The bread should sound hollow when tapped. Once baked, cool it in the pan for ten minutes. Transfer it to a wire rack to cool completely before slicing.
Tips & Tricks
How to Achieve the Fluffiest Bread
To make your milk bread super fluffy, follow a few key steps. Use warm milk around 110°F (45°C) to activate the yeast. This warmth helps the yeast grow. Let your dough rise in a warm, draft-free spot. A cozy oven or a sunny window works well. Also, don’t skip the kneading. Knead the dough until it’s smooth and elastic. This builds the structure needed for fluffiness.
Common Mistakes to Avoid
Many new bakers make a few common mistakes. First, don’t use cold milk. Cold milk can slow down the yeast. Second, measure your flour correctly. Too much flour can make the bread dense. Always spoon flour into your measuring cup and level it off. Lastly, avoid over-kneading. If you knead too much, the bread can become tough.
Best Practices for Kneading Dough
Kneading dough is fun and simple. Start with a lightly floured surface. Place your dough on it and fold it in half. Push it down and away with the heel of your hand. Turn it a quarter turn and repeat. Knead for about 10 minutes until the dough feels smooth and springs back when pressed. If it sticks, add a little more flour, but not too much. You want a soft dough that still holds its shape.
Pro Tips
- Check Your Yeast: Always ensure your yeast is fresh and active. If it doesn’t froth up in warm milk, it may be expired, and your bread won’t rise properly.
- Knead Properly: Kneading develops gluten, which gives bread its structure. Make sure to knead until the dough is smooth and elastic for the best texture.
- Temperature Matters: Let the dough rise in a warm, draft-free area. If your kitchen is cool, you can place the dough in an oven with just the light on to create a warm environment.
- Cool Before Slicing: Allow your bread to cool completely before slicing to maintain its fluffy texture. Slicing too soon can result in a gummy crumb.
Variations
Flavored Milk Bread Options
You can easily add flavors to your milk bread. Here are some ideas:
– Cinnamon Raisin: Add 1 tablespoon of ground cinnamon and 1 cup of raisins to the dough.
– Herb Infusion: Mix in 2 tablespoons of dried herbs like rosemary or thyme.
– Garlic Bread: Add 2-3 minced garlic cloves to the melted butter before mixing.
These flavors can make your bread stand out at any meal.
Add-ins and Toppings
Adding extras can make your milk bread even better. Here are some fun options:
– Nuts and Seeds: Try 1/2 cup of walnuts or sunflower seeds for crunch.
– Cheese: Stir in 1 cup of shredded cheese, like cheddar or mozzarella.
– Fruits: Fold in 1 cup of chopped apples or berries for a sweet twist.
Top your baked bread with a sprinkle of sea salt or sesame seeds for a nice finish.
Gluten-Free Adaptation
If you need a gluten-free milk bread, it’s possible. Use gluten-free flour blends instead of all-purpose flour. Make sure it has xanthan gum for the best texture. Follow the same steps in the recipe. Your bread may not rise as much, but it will still taste great. Enjoy making this version with your favorite gluten-free products!
Storage Info
Storing Leftover Milk Bread
After you bake your easy milk bread, let it cool completely. Place it in a plastic bag or wrap it in foil. This keeps the bread soft and fresh. Store it at room temperature for up to three days. If you want it to last longer, consider freezing.
Freezing Instructions
To freeze your leftover milk bread, slice it first. This makes it easy to grab a piece later. Wrap each slice in plastic wrap, then place them in a freezer bag. Squeeze out all the air and seal it tightly. You can freeze the bread for up to three months.
Reheating Tips
When you are ready to enjoy your frozen milk bread, take out only what you need. You can reheat it in a toaster or oven. For the toaster, set it to medium. For the oven, preheat it to 350°F (175°C) and warm for about 10 minutes. This will bring back the soft, fluffy texture. If you want a golden crust, brush a little milk on top before reheating. Enjoy your warm milk bread!
FAQs
What makes this milk bread easy to make?
This milk bread is easy because it uses simple ingredients. You mix warm milk, yeast, and sugar to start. Then, you add flour, salt, butter, and an egg. The dough comes together quickly, and you only need to knead it for about 10 minutes. This bread does not need complicated techniques. Just follow the steps, and you will have fluffy bread.
Can I use any type of milk?
Yes, you can use any type of milk. Whole milk gives a rich taste. Almond milk or oat milk works too. Just make sure the milk is warm, about 110°F or 45°C. This warmth helps the yeast activate. The milk you choose can slightly change the flavor, but it will still be tasty.
How do I know when the dough has risen enough?
The dough has risen enough when it doubles in size. You can check this after about one hour. Gently press your finger into the dough. If it holds the shape and does not spring back, it is ready. This means the air bubbles formed inside are good. Punching it down helps release some of those bubbles.
What is the ideal temperature for rising dough?
The best temperature for rising dough is warm, around 75°F to 80°F (24°C to 27°C). You can place the bowl near a warm oven or in a sunny spot. If it is too cold, the dough will rise slowly. If it is too hot, the yeast may die. Find a nice, cozy spot for your dough.
How long does homemade milk bread last?
Homemade milk bread lasts about 3 to 5 days at room temperature. Store it in a bread bag or wrapped in a kitchen cloth. If you want it to last longer, freeze it. It can stay good in the freezer for up to three months. Just make sure to wrap it well to prevent freezer burn.
Now you have the tools to make delicious milk bread at home. From the right ingredients to the best techniques, each step brings you closer to success. Remember to measure accurately and knead well for that fluffy texture. Don’t shy away from trying different flavors and storage methods. With practice, you can avoid common mistakes and create perfect loaves every time. Enjoy baking and sharing your milk brea